Tuesday, September 4, 2018

Mass Generated K2 Log In Cards: An ITRT Recipe

Conditional Formatting + Colored Tape + AutoCrat = Easy Logging in for K2 Students


Younger students can have difficulty logging in to computers, especially if they don't have prior experience with computers. By using a modified version of Christine Pinto's template, you can create a bunch of cards at one time.

Ingredients:

  • Excel (must be Excel) Spreadsheet of student usernames and passwords
  • Autocrat Template (force copy available at the link)
  • 'To Merge' Template (force copy available at the link)
  • CombineSheets Sheets Add On

Skill Level/Time required:

  • Intermediate
  • 30 minutes

Procedure:

  1. Be sure that usernames and passwords are on two different sheets within your Excel spreadsheet.
  2. On your usernames tab, navigate to Data --> Text to Columns.
  3. Choose Fixed Width --> Next.
  4. Click between each character to draw a line. Hit Finish.
  5. Repeat this on the passwords tab.
  6. On 'To Merge' Template, input students' first and last names.
  7. From your Excel sheet, copy character-separated usernames and paste them into the Google Sheet in the cells entitled "un1 to un19". Repeat this for passwords in the cells "pw1-pw5." Add or subtract cells as needed, and be sure to update any changes on your Autocrat template. 
  8. Install/run AutoCrat in your 'To Merge' Template. For explicit directions on AutoCrat, click here for an overview or watch the video directions below. 
  9. Open one of the newly-minted sheets. Install/run the CombineSheets add on. Combine all of the Sheets you just created.
  10. Open the same Sheet from step nine. Click the down arrow on the tab and choose 'Copy to...' the new Sheet you created in step 9.
  11. Use the format painter to 'grab' the format from the new tab. Apply it to the entire sheet. 
  12. Format as necessary.
  13. Print and (laminate, if desired). 

Implementing with your students:

  1. Color code your keys according to the directions in Christine Pinto's original blog post. 
    • The numbers are red taped, the QWERTY row is yellow, the ASDFG is green, and the ZXCV row is purple (or pink if your color printer went rogue like mine!)
  2. Show your students how the colors on their cards correspond to the keys on the keyboard. 
  3. Marvel in their success! 

Video directions:


Making Testicular Self-Exams Standard Practice in Virginia's High Schools

"To keep the body in good health is a duty... otherwise we shall not be able to keep our mind strong and clear." 
-Buddha

Looking to access the PSA immediately? Click here to watch the video.

Part of being a fourth grade teacher (my full-time job for the past five years) is the dreaded end-of-year “your body is going to start changing” talk. While I spend lots of my free time outside of school being an advocate for testicular cancer awareness through my blog A Ballsy Sense of Tumor, I don't often talk about testicles with my students. 

After completing my yearly lesson, I started wondering if the Virginia health curriculum includes education about testicular self-exams. I did some research and found that self-checks are only explicitly mentioned in one standard in 9th grade: “The student will demonstrate understanding of specific health issues, including the ability to conduct self examinations.” It’s indirectly mentioned in 10th grade: the student will “identify regular screenings, tests, and other medical examinations and their role in reducing health risks.”

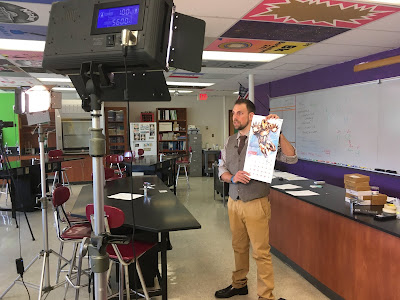
Filming at the High School

In my opinion, these passing mentions are not nearly enough. Doctors recommend that both testicular and breast self-examinations are done once per month when full physical maturity is reached. For some students, this could be as young as fifteen years old. During their eleventh and twelfth grade years, Virginia students are not exposed to any information about the importance of self-examinations, which is when most students will have reached full maturity. The current standards were, in my opinion, not enough. It’s unrealistic to expect students to form the habit of regular self-exams based on one passing mention in ninth grade. This reality is even more alarming when paired with a 2016 study by the Testicular Cancer Society that found over 60% of young men have never been told about testicular cancer. Something needed to be done.

As a man of action, I decided to write to the Virginia Department of Education (VDOE) to express my concerns and to work with them on a solution. Within a few weeks, Vanessa Wigand, the VDOE Coordinator of Health Education, Driver Education, Physical Education & Athletics, emailed me back. She suggested that I script and star in an instructional video about testicular cancer and the importance of self-exams. Furthermore, she suggested having high school film department students film, edit, and produce the video. I loved that idea, especially the part about having high school students assist, as they are a part of the target demographic I’m trying to reach.

Around the same time as my discussion with Vanessa, I was at an EdTechTeam Apple Conference, and attended a session by Steven Knight, the Coordinator of Digital Learning for Falls Church City Schools. Since his presentation was all about video production, I approached him about having his students help produce the video. He loved the idea and later shared that he is also a cancer survivor.

With the technical side of things locked down, I began to work on the script the self-exam video. With the help of my sister, a high school senior, I polled some high school students and asked them what they’d want in a self-check video.According to the results, they’d like something that included a blend of humor, serious information, personal stories, and a how-to. I kept these recommendations in mind as I wrote the script.

I knew that my story wouldn’t necessarily be the most relevant to high schoolers, since I am ridiculously old compared to them. I needed someone their own age to share his story, so I reached out to Grant Moseley, a current high school senior and testicular cancer survivor who was diagnosed at 17. He agreed to write and share his story.

In early April, which is also testicular cancer awareness month, I filmed my sections, including my own story, information about testicular cancer, and narrating an animated self-exam demonstration, at George Mason High School under the direction of Steven, Kenneth George (the school’s film teacher,) and his high school student film crew. Beyond the coolness factor of being on camera, I loved seeing the three male students show expressions of intrigue while I shared some facts about testicular cancer. Later, when I spoke with one of the students, he said he had previously heard about testicular cancer but never knew exactly how to do a self-exam before filming. Mission accomplished.

Full disclosure - while I had my lines totally memorized well in advance, I messed up about 384 times while filming. Something about having two cameras on you is intimidating, but I felt confident in my final takes and in the editing skills of the students.

My faith in them was rewarded - they actually made me look good! Rather than tell you about their awesome work, I’m embedding the final product below (or watch it directly on YouTube here). While it is 11 minutes long (practically decades in this era of YouTube), it’s well worth the watch!


I had a chance to debut the video at the Virginia Health and Physical Activity Institute. In two sessions, I provided statistics, tips, and other information about testicular cancer to a number of health educators and curriculum coordinators. The attendees seemed to enjoy the video and especially liked that it was a comprehensive resource that covered all the bases, with a great blend of personal stories, information, school-appropriate humor, and an animated self-exam demo. Many eagerly asked where it would be located so that they can use it in their own districts.

Vanessa happened to be in the session and said that the video is posted on Health Smart Virginia, which is an online depository of lesson resources. To access it and other resources, visit this link and select "Health Smart VA Lesson Plans" under "Health Promotion." Scroll to Unit 27 - Grade 9 - Testicular Cancer 101 Video. These resources are also located in similar places in Grade 10, but it's the same information either way.

She also said she will send it directly to all health curriculum coordinators across the state, which will hopefully help the video become regular viewing material for all high school grades.

While I am honored to have made an impact on Virginia’s curriculum, I always want to have as big of a reach as possible when it comes to testicular cancer awareness. In the 50 states of the US (and Washington, DC), only 18 states make a specific mention of testicular self checks in their mandated health curriculums. Of these 18, only two states (California and Washington) include standards that address how to do a self exam in grades 9-12. Consult the map below to see if your state made the cut or not.


If your state has room to grow, please send this blog post or the link to this educational site (which is also posted on Health Smart Virginia) to the relevant parties in your state. I personally plan on reaching out to the “Vanessas” of each state in hopes to make this a national project.

In closing, I would like to offer a sincere thank you to all of those who helped support this project, including Vanessa and the VDOE, Grant Moseley, the Moseley family, Eric Manneschmidt (who filmed and edited Grant’s section), Steven Knight, Kenneth George, the high school film students, my colleagues at school who helped review my script, and countless others. This was truly a collaborative project.

We put forth the effort to produce this video, and now the ball is in your court to watch and share this video. As I said in the closing of the video, together, we can get the ball rolling on discussing the importance of testicular self-exams.

Friday, August 24, 2018

Lesson Plan Feedback Form: An ITRT Recipe

Provide feedback to your teachers on lesson plans (or anything else you'd like)!


Administrators and coaches, pick your path - intermediate or advanced - to provide automatic and personalized feedback to your teachers.

Ingredients:

  • Google Form
  • FormValues (Google Forms Add On - optional, but recommended)
  • Google Sheet
  • Google Doc
  • AutoCrat (Google Sheets Add On)
  • ADVANCED INGREDIENTS:
    • =VLOOKUP (Google Sheets Formula)
    • CopyDown (Google Sheets Add On)

Skill Level/Time required:

  • Intermediate: 30-45
  • If following Advanced directions: 60-90 minutes

Procedure:

  1. Create a Google Form that addresses all the area you wish to give feedback on. For this example, my admin wanted to be able to address Teacher Name, Date, Subject Area, Standard Present in Lesson Plan, Learning Intentions/Success Criteria, and Required Lesson Plan Elements (Flow, Opportunities to Respond, Student Engagement Strategies, and Feedback). 
    • If you are following the Intermediate directions, also include a textbox for teacher email. 
    • If following the Advanced directions, you will set this up to run automatically in step 6.
    • Using the FormValues Add on for Forms can help if you will be using the same values in Forms over and over. In this case, I used it for teacher name. 
  2. From the responses tab, create a spreadsheet of responses. Open the Sheet. 
  3. Create a new Google Doc and title it 'Lesson Plan Feedback Template' or something similar. 
  4. Create a template using the column headers from the Google Sheets within merge tags, which look like this: << and >>. This will help with Autocrat in step 7. 
    • For the "demographic information," I used two column tables - left containing the prompt (Teacher Name) and right containing the tag for Form response (<<Teacher Name>>). 
    • I used two-row tables - the top row had the "Look For" (How are learning intentions and success criteria evident?) and the bottom contain the tag for the Form response (<<How are learning intentions and success criteria evident? >>)
  5. Go to your Sheet from step 2.
  6. OPTIONAL, ADVANCED STEPS. IF CHOOSING NOT TO DO THESE, SKIP TO STEP 7. 
    • This step allows you to automatically insert emails and specific folder placements. It takes time on the front end, but will end up saving you (and your teachers) lots of time and organization in the long run.
    • Go to your Google Drive and set up individual folders for each teacher that you'll be providing feedback to. 
    • Add a new page to the Sheet you opened in step 5. In column A, put the teachers' names as they appear in the Form. Column B should contain their email addresses. 
    • In Column C, cut and paste the folder ID in for each teacher. The folder ID is a long string of characters after /folder/ in the Google Drive URL. They all look similar to "1P6euIGuXwTiBb4NS40ykzpBR3yc1qsSN"
    • Back in the first page of the Sheet, add two columns - one titled Email and one titled Folder Reference.
    • Install/open the Copy Down Add on. It will prompt you to place the following formulas in a row it will create for you. 
    • In the new row, in both columns for Email and Folder reference, you will be writing a =VLOOKUP formula. It will look similar to =VLOOKUP(C3,Sheet2!$A$1:$B$45,2,false). Sheets does an ok job of guiding you what to type in and the optional video directions will explain this more. 
    • After you've done all this, you can join the rest of the class in step 7, and be sure to follow the optional, advanced directions in step 8, so all of your hard work pays off. To be fair, I did warn you that these were Advanced.
  7. Install/open the AutoCrat Add on. Run through the steps, using the template you created in step 3. If you set up the template in step 4 correctly, it should be easy, with just a lot of clicking through screens. Click here for an overview of the different Autocrat screens. If following the basic directions, you can entirely skip screen 6. 
  8. OPTIONAL, ADVANCED STEPS. IF CHOOSING NOT TO DO THESE, SKIP TO STEP 9. 
    • You must set up screen 6 if you have chosen the advanced path. The above tutorial explains how to do it. See, that wasn't too terrible! 
  9. At the end, choose Save. Depending on what you chose for triggers, once you begin using the Form, the Feedback Docs will be created instantly, on certain time triggers, or run manually. 

Implementing with your teachers:

  1. Bookmark the viewable Google Form somewhere in your bookmarks bar. 
  2. Do your observation/feedback for the lesson plan/instruction in the Google Form. 
  3. Press "Submit." 
  4. If you have followed the intermediate directions, the teachers will get an email with your feedback. If you have followed the advanced directions, they will receive an email AND it will be filed in their individual folder.

Video directions:

Overall directions -


Advanced directions -


Pivot Table for Large Assessment Files: An ITRT Recipe

When you have a lot of data to sort through, a pivot table may be your solution. 


This recipe would be best for administrators or coaches who have access to building/grade level data, since a typical classroom teacher may not have hundreds of rows of data, which is the value of a pivot table.

Ingredients:

  • Google Sheet of data 
    • (If in Excel, open in Sheets)
  • Pivot Table

Skill Level/Time required:

  • Beginner - I promise that pivot tables sound scarier than they are.
  • 10-15 minutes

Procedure:

  1. Open your Sheet of data. 
  2. Along the menu bar, go to Data --> Pivot Table. This will create a new tab on your sheet and open the Pivot Table Editor menu.
  3. In Rows, Add the data you want to sort. In this example, I used 'Item Description' so we could see all the type of questions. 
  4. In Columns, Add the 'qualifiers' that you want to count by. In this example, I used 'Correct/Incorrect,' but you can have multiple columns that will nest in each other. 
  5. In Values, use the same value as in Columns. Be sure it is set to 'COUNTA.'

Implementing:

  1. Use this Pivot table to see areas of strength and weakness. 
  2. Add in a column with a formula to calculate the percentage correct or incorrect to make it easier.

Video directions:


Thursday, August 23, 2018

Paperless Classroom Sign Out: An ITRT Recipe

Develop a paperless classroom sign-out system with Google Forms and CheckItOut.


Keep track of who is where, without the hassle of tracking down tons of sheets of paper.

 Ingredients:

Skill Level/Time required:

  • Intermediate 
  • 30-45 minutes

Procedure:

  1. Create a new Google Form.
  2. Delete the first automatically generated question.
  3. Install and open the CheckItOut Add On. Select 'Add/Edit Question Set.'
  4. Select 'Add New' and retitle 'Check in/out set name' as "Students" or something similar. 
  5. Change 'Question type' to 'Choose from a list.'
  6. Leave the remaining two boxes alone (or change the second one to 'All students are present.'
  7. Select 'Add.'
  8. Add a list of student names into the first new question CheckItOut generated.
  9. Optional: Add a text field for Destination
  10. Set up the viewable Form on a dedicated device or generate a short link/QR code that links to it. 

Implementing with your students:

  1. Depending what you chose in step 8, place this device/short link/QR near an easily accessible place. 
  2. When students sign out, they select their name in the first drop down. When they return, they select their name in the second drop down. 
  3. They don't need to add time or date, since Google Forms will do this automatically. 
    • Go to the Responses tab in the edit screen of Google Forms to see this information.

Video directions:


Classroom Library Digital Book Log: An ITRT Recipe

A continuation from Classroom Library Digital Check-Out System, this recipe will teach you to make a book log for your students.


A great way for students to track their independent reading, in addition to keep accountability!

'Ingredients:

Skill Level/Time required:

  • Intermediate
  • 30-45 minutes

Procedure:

  1. Be sure to already have your Classroom Library Digital Check-Out System set up and ready to go. If you have not already embedded it into a Google Site, do so now. 
  2. From the responses tab in the Check-Out Form, create a Sheet of responses. 
  3. Use the blue Share button to make it 'Viewable by Link.'
  4. Right click on the the '1' vertical axis to add a row under the row. Use the View menu to Freeze rows 1 and 2.
  5. Type 'CategoryFilter' in cells B2, C2, and D2. Type 'Hidden' in cells E2 and F2.
  6. Go to Awesome-Table.com. Sign in with whatever Google account is linked to this sheet. 
  7. Select 'Create a New View - Blank.' Select the spreadsheet you were just working on. You shouldn't have to mess with any of the setting, so press 'Create.'
  8. If necessary, press the pencil icon to get into editing mode. Assuming everything was set up correctly in step 4, there shouldn't be much you need to edit. Double check by click on the various drop downs. 
  9. Click the share button (it kind of looks like a triangle that is missing a side). Copy the "Link to Share."
  10. Go to your Google Site and create a page for the book log.
  11. Double click anywhere on the page and select 'Embed.' Paste the link you copied in step 9. A preview should pop up and select 'Insert.'
  12. Press Publish on your Google Site. 

Implementing with your students:

  1. Direct them to the page that has the book log. 
  2. Show them how they can see their own book log page or other students' pages. 
    • This will help them track their own reading, in addition to get recommendations and check on the status of books from other.

Video directions:


Thursday, August 16, 2018

Classroom Library Digital Check-Out System: An ITRT Recipe

Looking for a paperless classroom library check-out system, without QR/Bar Codes?


Using Google Forms and an add-on, you can easily create this user-friendly system.

 Ingredients:

Skill Level/Time required:

  • Intermediate 
  • 30-45 minutes

Procedure:

  1. Make a copy of the Google Form Template from the Ingredients (or from here). Make the form as decorative as you'd like.
  2. Add, edit, or remove any questions you would like. Be sure to fill in your class list in student name and edit/add the genres you want. 
  3. Install and open the CheckItOut Add On. Select 'Add/Edit Question Set.'
  4. Select 'Add New' and retitle 'Check in/out set name' as "Book" or something similar. 
  5. Change 'Question type' to 'Text with Listbox.'
  6. Leave the remaining two boxes alone and select 'Add.'
  7. If desired, move 'Author Name' and 'Genre' below the two questions CheckItOut added. 
  8. OPTIONAL - Embed the Google Form into a Google Site. (This optional step will help if you choose to make the 'Reading Log' public later - directions here).
  9. Use a Link Shortener to shorten the Google Form (or Google Site) URL. Alternatively, link to it from your Google Classroom or class website. 

Implementing with your students:

  1. Direct them to the check out form (wherever you placed it in step 9). 
  2. All directions are in the Form: 
    • They can select their name and genre from the drop down list. 
    • If they are checking a book out, they will type the full title under 'Check out.' 
    • If they are checking a book back in, select it from the menu under 'Check in.' 
    • They must also type in author name.

Video directions:

Monday, June 18, 2018

Five Firsts in my Fifth Year

I've never been someone that's had a five-year plan. That just... doesn't give you the chance to be flexible. 
-Eric Bana

It's the first Monday of my summer vacation and I just returned from my first morning run. In a few hours, I'll be seeing my first (of many, thanks to MoviePass) movie of the summer - Incredibles II. Due to my school district moving to a pre-Labor day start for the 2018-2019 school year, this summer is rather short. This year marked my fifth year as a fourth grade teacher. While five years seems like a really long time and doesn't leave much room for "new," I realized that there were five major "firsts" this year. Since I hate blogs that are just personal reflections, I'll also be sharing how these can impact your classroom.

It was my first year in yet another new classroom

First day selfie on top...
Final day on the bottom
For those of you playing the home game, this year marked my third classroom in five years. My first move was due to relocating in Virginia, and this one was so I could be closer to home. I have to say, a ten-minute commute (compared to my previous 45-90 minutes) is a beautiful thing. 

A new classroom means a new set up, different expectations, and more. I can definitely say that this school was the best fit for me. My students and team were great (I'll expand on these both more later) and my administration was incredible.

How this can impact your classroom

Don't be afraid to try for a new position. Whatever your reason, be it closer to home, a desired change in vision, or anything else, this shift could be a wonderful thing for you. That being said, I do not necessarily recommend moving classrooms every year, though lugging around so many boxes is a great workout. 

It was my first year without 1:1 Chromebooks

The only real "downside" to my new classroom was that I was not permitted to use my DonorsChoose class set of Chromebooks, due to district policies. While I totally get the rationale (devices not owned/managed by districts can become a nightmare), it definitely was a big shift in my instructional practice. I had to share a cart of Windows laptops with another teacher. 

However, around the holidays, I realized this ended up being a good thing. It forced me to switch up some lessons, explicitly teach how to effectively collaborate with partners while using devices, and refine my whole group/small group skills.  

How this can impact your classroom

Technology is the tool, not the lone savior. Do not become too reliant on computers, since you never know when they might go away. Focus on the teaching and use technology to augment the lessons, but never make it the only way you instruct.

It was my first year of having nicknames for every student

Nicknames have been a hallmark of my teaching since I began way back in 2013. It's always fun to say, "Youngblood, your reading teacher is here" and watch the shocked look on her face. However, I've never had a year where all my students have had nicknames. In the past, some students just straight up didn't want them, and in some cases, I couldn't find a organic fit. Nothing is worse than forcing a nickname.

This year, all 25 of my students had nicknames, from the reasonable "Tiny" for the smallest student in the room to the ironic "Trouble Family: Trouble, Double Trouble, Triple Trouble, and Quad Trouble" (the four quietest girls in the room) to the completely random "Jim Boy" for a student whose name was not Jim nor even James. This is a small thing, but helped create a sense of community and belonging in the classroom. Even my "Nemesis" loved her nickname and was in tears at the end of the year when it was all over. 

How this can impact your classroom

It doesn't have to be nicknames, but do something that make your students feel special. There are a billion viral videos of personal handshakes for each students, or create something that is you. No matter what - students need to feel welcome and embraced in your classroom. It doesn't have to be a major endeavor, but it has to be noticed by the students. You can't teach someone who doesn't want to learn from you.

It was my first year that I got along personally and professionally with ALL members of my team

Super teachers!
This isn't to say I actively disliked past teams. I still keep in touch with many old colleagues, but this is the first year that I felt like all members of my team let me do things "The Justin Way", without pushing their ideas onto me. (The Justin Way is hard to accurately describe, and I have been trying for three years on this blog to define it, to no avail.) We shared ideas and helped each other grow, but in a way in which everyone's ideas were respected and no one was criticized.

How this can impact your classroom

If you're on a team like this, be grateful. If you're not, see what you can do to change the culture. Team dynamics are hard to balance, but pays off in great dividends when they work. Put the time in to ensure it works and be open with your communication.

It was the first year I felt I had good work/life balance

Teachers suck at work/life balance. Not a controversial take, and I was among them in the beginning of my career. This year, I made a commitment to take care of me more and to enjoy my life outside of work. While teaching is a career that requires it to be a true labor of love, it's also important to realize that it is a job, and you work to live. There's no purpose in working yourself to the grindstone if you have nothing outside of work to look forward to.  

How this can impact your classroom

Find a hobby that has nothing to do with education. For me, it's writing about testicular cancer and men's health, but that's probably not your thing. (Though if it is, hit me up!) It's important to be a person first and a teacher second. After all, you cannot give them your 100% if you're not at your own personal best.

Set limits on yourself. The ones who should be working hardest are the students - not you, furiously lesson planning and grading papers at 1 am. 

A bonus point as I look to my sixth year in education  


It was my last year as a fourth grade teacher

One last selfie in the classroom
It's been a great five years as a fourth grade teacher, and I would say that this year was my best, between the above five points, the end of year academic gains my students made (including the highest pass rate on end-of-year assessments I've ever had), and more that didn't make it in this blog. That being said, this past Friday was my last day in the realm of fourth grade education. 

Starting on August 1, I will be transitioning roles to an Instructional Technology Resource Teacher (also called a tech coach, technology integrator, TOSA, or other titles depending on where you live). While I will still be within my same school district, I will be at a different school, meaning this is the fourth change for me (and fourth workout thanks to carrying around boxes). 

I have wanted to pursue this position for a few years, but kept putting it off. I had opportunities the past two years to make the change, but turned it down on both occasions (apparently you cannot get a mortgage if you don't have a signed work contract - who knew). I almost decided not to apply this year since I was having such a great year, but it felt like a good time to make the switch. I am beyond excited to start this new role, but I will miss working directly with my own class. 

How this can impact your classroom

Like I said in the first point, if there's a change in assignment you've been eyeing up... go for it. There's no time like the present. The great thing about teaching is that there are so many different things you can do and still be within the realm of education. If you want to try something new, give it a whirl and know you can always go back if it's not what you thought. 

And while you're changing roles, purge things that won't be directly related to your new job. Hand it off to colleagues or the teacher taking over your room. 

They (and your back) will thank you. 

Saturday, June 9, 2018

A Review of Illuminate: Technology Enhanced Learning by Bethany Petty

While I may not have been blogging here much this year (seeing as this is only my second post of 2018), I have been reading up a storm. This is part of a commitment to myself to continue using my time to trying define surviving life after cancer. I've set a goal to read 100 books this year, and the majority of them have been thrillers, and only one from January to May was about teaching.

However, I recently received an email from Bethany Petty, who I originally connected with through my former work with Breakout EDU Digital (which gets a shout out in one of the chapters - always cool to see Justin Birckbichler in print, and kudos for spelling is correctly).

She had just published Illuminate: Technology Enhanced Learning through EdTechTeam Press and wanted to share her message with the world. I told her I would be happy to read and review her book, though she may not need it since as of this writing, it is the number one new release in the Amazon store for Science and Technology Teaching Materials! About a week later, it showed up on my doorstep, and approximately 24 hours later, the book moved from my "Currently Reading" shelf to my "Read" shelf on Goodreads.

I highly recommend this book.
Click here to order your own copy.
This is more about the book being so easy to read more so than it being a short book. Bethany writes in a very conversational tone and shares many engaging anecdotes about her personal experiences as a learner, a teacher, a mom, a friend, and a blogger to back up her points.

The book is broken into ten chapters, with each one covering using technology to engage, explore, create, communicate, think critically, assess, reflect, motivate, design lessons, and connect. I learned something new from each chapter and wish I had read this when I didn't have just five days left in school, so I could implement them this year.

I loved that the book was not based entirely on the tech tools, but more on applications of each tool. New ideas that I had never considered before were presented in each chapter. A ton of stickies now adorn my copy with things I'd like to try in my own classroom.

While the focal point of the book is the "why/how" to use different tools, the "what" tool to use is also addressed. I consider myself pretty in the know about educational technology, but there were about six tools I had never heard of or knew what they did. The 35 tools are helpfully categorized in the "Tech Tools Index" at the back of the book, which made it easy to count up how many I need to learn about soon, but even more nuggets of wisdom are sprinkled throughout the book, making the grand total much higher. Luckily, blank notes pages are included at the end of each chapter to keep it all organized.

A common fear about print books about technology is that they will be outdated within a year or two. Bethany has helpfully included QR codes (which she shares a number of educational uses for throughout the book) to blog posts she has written about the subject. In my interactions with Bethany, I know she is on the ball when it comes to educational technology, and these blogs will be updated as current technology is refined and new, better tools are developed. Essentially, you are getting two books for the price of one - the one in your hand and the future iterations of her blog.

Thank you for allowing me the chance to read and review this book, Bethany. I thoroughly enjoyed every page of Illuminate: Technology Enhanced Learning and look forward to seeing your work continue to grow!

Saturday, February 3, 2018

Digit Detectives: Student-Created Number Talks

“Since the heart of number talks is classroom conversation, it is appropriate for the teacher to move into the role of the facilitator.”
- Sherry Parrish

AUTHOR'S NOTE: Before reading this piece, I strongly suggest you read my original number talk piece here. After reading it, come back here to read about the next level. 

A critical part of our daily math routine is beginning with a number talk. As a brief recap, they're 10-15 minute experiences where students are presented with a math prompt and have to work out various solutions using only mental math. Most number talks can have more than one answer and follow similar formats. Various norms (such as hand signals) are established to ensure that the experience runs smoothly.

Leading the tape measure Estimation 180
One thing I am very passionate about is giving students ownership and control over their learning.

They already write the weekly newsletter, lead our daily morning meetings, and help develop flipped classroom videos. In reflecting on where I could turn over more control to my students, I realized they could run number talks.

Teacher's assistant (the student who basically acts as a miniature version of me) is a highly coveted classroom job in Room 31, and it felt like a natural place for passing off the task. Once other students saw the teacher's assistant running the show, they begged that person for a chance. I'm always impressed by how gracious the teacher's assistant is in allowing others to have a chance.

The number talks all follow certain patterns and routines, based on the specific type (see the original blog post for an explanation of the types). One type that I didn't explain in the original post was Estimation 180. This is a fantastic website where various pictures are shown and students must make estimations based on other information in the picture or previous days' information. For example, a student recently led a five-day long continuous number talk about tape measures, in which a new, larger tape measure was introduced every day and the students had to estimate the new measures length.

Before and after students lead a number talk, I conference with them about what I'll be looking for while they lead. I want them to reinforce the norms and to push student on their thinking, which often times can be as simple as asking, "Why do you think that?" I encourage them to model it as if I were given the number talk.

A physical plan before
I converted it digitally
Generally speaking, I open up that day's number talk from this Google Slidedeck (feel free to make a copy of it) and turn it over to the student. As I do while I'm leading a number talk, I stay out of it and let them run the show. On occasion, I will put my thumb up (indicating I have an answer I'd like to share). Sometimes I will give a "correct" answer and model my thought process, and other times I will purposely give a wrong answer and see if other students catch it and use the disagreement signal (raising their hand). Spoiler - they usually do and love saying, "I disagree with Mr. B!"

While allowing students to lead number talks are great, they're still basically regurgitating information I'm giving them. I want them to be creators and true leaders of their learning.

I decided to ask the teacher's assistant for the month of January to start developing some of her own number talks, based on the "Mystery Number" and "Balance the Scale" format (again, see the original post for in-depth explanations).

Full disclosure - this girl is literally the shyest girl I have ever had in my entire teaching career. Asking her to lead number talks was one thing, but creating one was a whole new ball game. Nevertheless, she stepped up and developed both in a matter of minutes. Since I store all of my number talks on Google Slides, she wrote it on paper and I quickly converted it to digital.

She absolutely rocked it. I really wish I filmed it, because she did a great job. Her first talk was based on balancing the scale for the value of 12. In addition to her choosing an ideal number (since 12 can be created so many different ways depending on the operations used), I was absolutely floored by the responses of her classmates. We have been working on polygons, and one student said, "hexagon plus hexagon." This opened up further polygon-based discussion, which brought a single tear to my eye.

 Leading his own "Mystery Number."
Immediately, former teacher's assistants asked if they could retroactively make some. Of course, I wasn't going to turn them down! The following day, a student created and led another "Balance the Scale," while another did a "Mystery Number" later in the week.

If you're planning on trying this with your students, I definitely recommend beginning with the two formats I began with (Balance the Scale and Mystery Number), in addition to "Which One Doesn't Belong." These seem to be the three easiest to develop and lead to rich discussion.

In the future, it would also be cool for students to begin developing some talks in the Estimation 180 set up. This would take a bit of prep work ahead of time, as this would require students to take pictures at home and send them to me. Who knows - this may be on the docket for my February teacher's assistant!